
Agent Auth 설정하기
Agent Auth 설정하기
Agent Auth를 사용하면 OAuth 2.0 자격 증명으로 에이전트가 어떤 시스템에든 안전하게 접근할 수 있어요. 설정부터 OAuth 제공자 구성, 에이전트 인증까지 단계별로 살펴볼게요.
출처: 문서
참고: Agent Auth는 베타 이며 활발히 개발 중입니다. 피드백을 제공하거나 이 기능을 사용하려면 LangChain 팀에 문의하세요.
본문
에이전트에서 OAuth 2.0 자격 증명을 사용해 어떤 시스템이든 안전하게 접근할 수 있게 해주는 Agent Auth를 설정하세요.
설치
Python
pip install langchain-auth
uv add langchain-auth
JavaScript
npm install @langchain/auth
빠른 시작
1. 클라이언트 초기화
Python
from langchain_auth import Client

client = Client(api_key="your-langsmith-api-key")
JavaScript
import { Client } from '@langchain/auth';

const client = new Client({ apiKey: 'your-...key' });
자체 호스팅 구성
자체 호스팅 LangSmith 인스턴스의 경우 인스턴스의 /api-host 경로를 사용해 API URL을 지정하세요.
환경 변수
export LANGSMITH_API_URL="https://your-langsmith-instance.com/api-host"
그런 다음 클라이언트를 정상적으로 초기화합니다:
client = Client(api_key="your-langsmith-api-key")
명시적 구성 (Python)
client = Client(
    api_key="your-langsmith-api-key",
    api_url="https://your-langsmith-instance.com/api-host"
)
명시적 구성 (JavaScript)
const client = new Client({
    apiKey: 'your-...ey',
    apiUrl: 'https://your-langsmith-instance.com/api-host'
});
2. OAuth 제공자 설정
에이전트가 인증할 수 있으려면 먼저 다음 과정을 통해 OAuth 제공자를 구성해야 합니다:
-
LangChain 플랫폼에서 사용할 OAuth 제공자에 대한 고유 식별자를 선택합니다 (예: "github-local-dev", "google-workspace-prod").
-
OAuth 제공자의 개발자 콘솔로 이동해 새 OAuth 애플리케이션을 만듭니다.
-
OAuth 제공자에서 콜백 URL을 설정합니다:
LangSmith Cloud
https://smith.langchain.com/host-oauth-callback/{provider_id}
예를 들어 provider_id가 "github-local-dev"라면:
https://smith.langchain.com/host-oauth-callback/github-local-dev
자체 호스팅
https://{your-langsmith-instance}/host-oauth-callback/{provider_id}
예를 들어 인스턴스가 langsmith.example.com이고 provider_id가 "github"라면:
https://langsmith.example.com/host-oauth-callback/github
- OAuth 앱의 자격 증명과 함께
client.create_oauth_provider()를 사용합니다:
Python
new_provider = await client.create_oauth_provider(
    provider_id="{provider_id}",  # Provide any unique ID
    name="{provider_display_name}",  # Provide any display name
    client_id="{your_client_id}",
    client_secret="{your_client_secret}",
    auth_url="{auth_url_of_your_provider}",
    token_url="{token_url_of_your_provider}",
)
JavaScript
const newProvider = await client.createOAuthProvider({
    providerId: '{provider_id}',  // Provide any unique ID
    name: '{provider_display_name}',  // Provide any display name
    clientId: '{your_client_id}',
    clientSecret: '{your_client_secret}',
    authUrl: '{auth_url_of_your_provider}',
    tokenUrl: '{token_url_of_your_provider}',
});
3. 에이전트에서 인증
클라이언트의 authenticate() API는 미리 구성된 제공자에서 OAuth 토큰을 얻는 데 사용됩니다. 첫 번째 호출에서는 호출자를 OAuth 2.0 인증 흐름으로 안내합니다.
LangGraph 컨텍스트에서
기본적으로 토큰은 Assistant ID 매개변수를 사용해 호출하는 에이전트에 범위가 지정됩니다.
auth_result = await client.authenticate(
    provider="{provider_id}",
    scopes=["scopeA"],
    user_id="your_user_id"  # Any unique identifier to scope this token to the human caller
)

# Or explicitly specify an agent_id for agent-scoped tokens
auth_result = await client.authenticate(
    provider="{provider_id}",
    scopes=["scopeA"],
    user_id="your_user_id",
    agent_id="specific-agent-id"  # Optional: explicitly set agent scope
)
실행 중 인증이 필요하면 SDK가 interrupt를 발생시킵니다. 에이전트 실행이 일시 중지되고 사용자에게 OAuth URL을 보여줍니다:
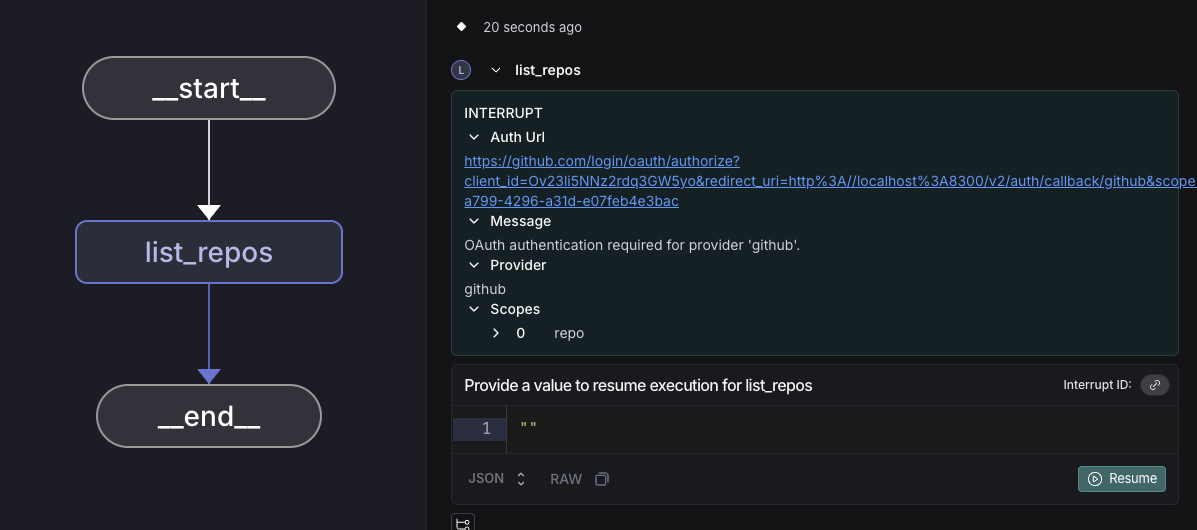
사용자가 OAuth 인증을 완료하고 제공자로부터 콜백을 받으면 인증 성공 페이지를 보게 됩니다.
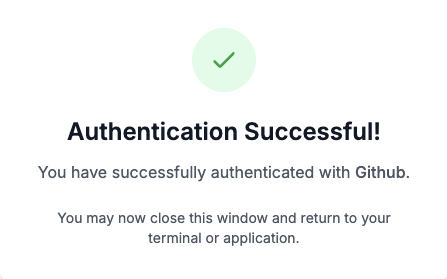
그러면 에이전트는 중단한 지점부터 실행을 재개하고, 토큰은 모든 API 호출에 사용할 수 있습니다. 사용자 또는 에이전트가 이후에 서비스를 사용할 때 OAuth 흐름이 필요하지 않도록 OAuth 토큰을 저장하고 새로 고칩니다.
token = auth_result.token
LangGraph 컨텍스트 밖에서
대역외(out-of-band) OAuth 흐름을 위해 auth_url을 사용자에게 제공하세요.
Python
auth_result = await client.authenticate(
    provider="{provider_id}",
    scopes=["scopeA"],
    user_id="your_user_id"
)

if auth_result.status == "pending":
    print(f"Complete OAuth at: {auth_result.url}")
    # Wait for user to complete OAuth
    completed_auth = await client.wait_for_completion(auth_result.auth_id)
    print("Authentication completed!")
else:
    token = auth_result.token
    print(f"Already authenticated, token: {token}")
JavaScript
const authResult = await client.authenticate({
    provider: '{provider_id}',
    scopes: ['scopeA'],
    userId: 'your_user_id'
});

if (authResult.status === 'pending') {
    console.log(`Complete OAuth at: ${authResult.authUrl}`);
    // Wait for user to complete OAuth
    const completedAuth = await client.waitForCompletion(authResult.authId);
    console.log('Authentication completed!');
} else {
    const token = authResult.token;
    console.log(`Already authenticated, token: ${token}`);
}
문제 해결
자체 호스팅: 405 Method Not Allowed
405 Method Not Allowed 오류가 발생하면 LANGSMITH_API_URL이 /api-host 경로를 가리키는지 확인하세요:
export LANGSMITH_API_URL="https://your-instance.com/api-host"
자체 호스팅: 잘못된 OAuth 콜백 URL
OAuth 제공자의 리다이렉트 URI가 LangSmith 인스턴스 URL과 일치하는지 확인하세요:
https://your-instance.com/host-oauth-callback/{provider_id}
더 알아보기
- OAuth 흐름 중 human-in-the-loop interrupt에 대해서는 Add human in the loop 문서를 참고하세요.
- 에이전트 인증 관련 기타 가이드는 Agent Server 문서를 확인해 보세요.