
GPT Actions 시작하기
GPT Actions 시작하기
Weather.gov 예시를 통해 Custom GPT와 GPT Action을 만드는 전체 과정을 단계별로 배워요. Open API 스키마 작성부터 인증, 테스트, 평가까지 다루는 가이드랍니다.
출처: 문서
본문
Weather.gov 예시
NSW(미국 국립기상청, National Weather Service)는 사용자가 임의의 위경도(lat-long) 지점에 대한 일기 예보를 조회할 수 있는 공개 API를 운영해요. 예보를 가져오려면 두 단계가 필요해요:
- 사용자가 api.weather.gov/points API에 lat-long을 제공하면 WFO(기상 예보 사무소, weather forecast office), grid-X, grid-Y 좌표를 돌려받아요
- 이 3가지 요소를 api.weather.gov/forecast API에 넣어 해당 좌표에 대한 예보를 가져와요
이 연습을 위해, 사용자가 도시, 랜드마크 또는 lat-long 좌표를 입력하면 그 위치의 일기 예보에 관한 질문에 답하는 Custom GPT를 만들어 보겠습니다.
1단계: Open API 스키마 작성 및 테스트 (Actions GPT 사용)
GPT Action은 API 호출의 파라미터를 설명하는 Open API 스키마(API를 기술하는 표준)가 필요해요.
OpenAI는 개발자가 이 스키마를 작성하도록 돕는 공개 Actions GPT를 출시했어요. 예를 들어 Actions GPT에 가서 이렇게 요청해 보세요: "Go to https://www.weather.gov/documentation/services-web-api and read the documentation on that page. Build an Open API Schema for the /points/{latitude},{longitude} and /gridpoints/{office}/{gridX},{gridY}/forecast" API calls"
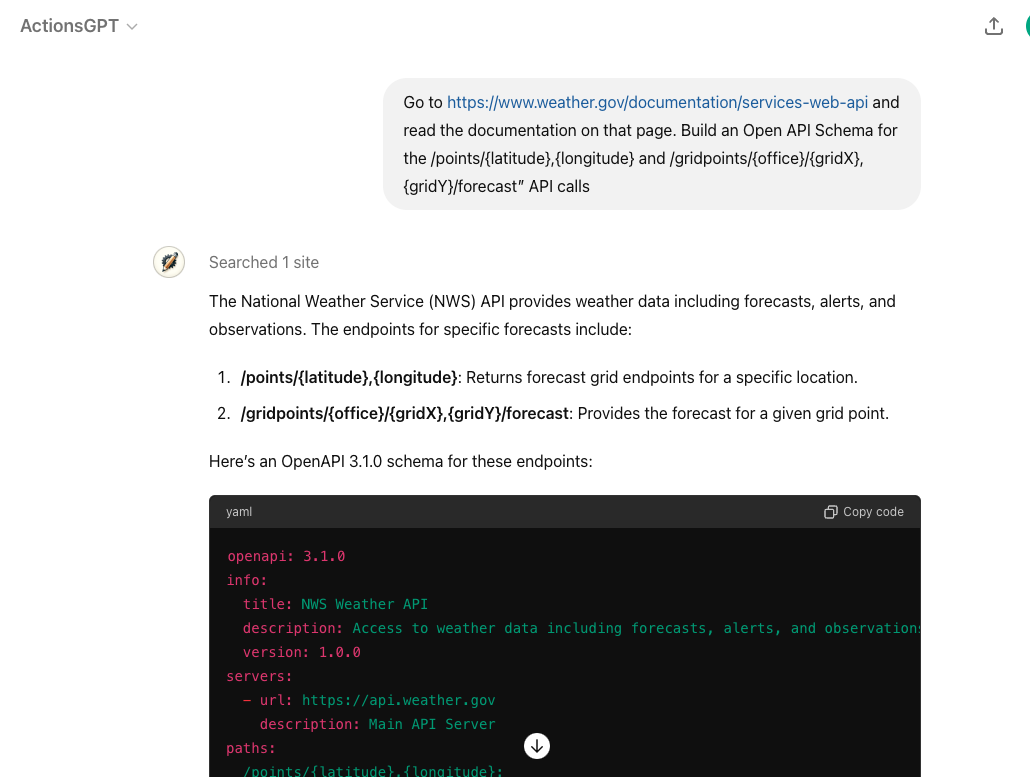
아래는 Actions GPT가 반환한 전체 Open API 스키마예요:
openapi: 3.1.0
info:
  title: NWS Weather API
  description: Access to weather data including forecasts, alerts, and observations.
  version: 1.0.0
servers:
  - url: https://api.weather.gov
    description: Main API Server
paths:
  /points/{latitude},{longitude}:
    get:
      operationId: getPointData
      summary: Get forecast grid endpoints for a specific location
      parameters:
        - name: latitude
          in: path
          required: true
          schema:
            type: number
            format: float
          description: Latitude of the point
        - name: longitude
          in: path
          required: true
          schema:
            type: number
            format: float
          description: Longitude of the point
      responses:
        "200":
          description: Successfully retrieved grid endpoints
          content:
            application/json:
              schema:
                type: object
                properties:
                  properties:
                    type: object
                    properties:
                      forecast:
                        type: string
                        format: uri
                      forecastHourly:
                        type: string
                        format: uri
                      forecastGridData:
                        type: string
                        format: uri

  /gridpoints/{office}/{gridX},{gridY}/forecast:
    get:
      operationId: getGridpointForecast
      summary: Get forecast for a given grid point
      parameters:
        - name: office
          in: path
          required: true
          schema:
            type: string
          description: Weather Forecast Office ID
        - name: gridX
          in: path
          required: true
          schema:
            type: integer
          description: X coordinate of the grid
        - name: gridY
          in: path
          required: true
          schema:
            type: integer
          description: Y coordinate of the grid
      responses:
        "200":
          description: Successfully retrieved gridpoint forecast
          content:
            application/json:
              schema:
                type: object
                properties:
                  properties:
                    type: object
                    properties:
                      periods:
                        type: array
                        items:
                          type: object
                          properties:
                            number:
                              type: integer
                            name:
                              type: string
                            startTime:
                              type: string
                              format: date-time
                            endTime:
                              type: string
                              format: date-time
                            temperature:
                              type: integer
                            temperatureUnit:
                              type: string
                            windSpeed:
                              type: string
                            windDirection:
                              type: string
                            icon:
                              type: string
                              format: uri
                            shortForecast:
                              type: string
                            detailedForecast:
                              type: string
ChatGPT는 맨 위의 info(특히 description)를 사용해 이 액션이 사용자 질문과 관련이 있는지 판단해요.
info:
  title: NWS Weather API
  description: Access to weather data including forecasts, alerts, and observations.
  version: 1.0.0
그리고 아래의 parameters가 스키마의 각 부분을 더 자세히 정의해요. 예를 들어, office 파라미터가 WFO(기상 예보 사무소, Weather Forecast Office)를 가리킨다는 것을 ChatGPT에 알려 주는 거예요.
/gridpoints/{office}/{gridX},{gridY}/forecast:
  get:
    operationId: getGridpointForecast
    summary: Get forecast for a given grid point
    parameters:
      - name: office
        in: path
        required: true
        schema:
          type: string
        description: Weather Forecast Office ID
핵심: 이 Open API 스키마에서 사용하는 스키마 이름과 설명에 특히 주의하세요. ChatGPT는 그 이름과 설명을 사용해 (a) 어떤 API 액션이 호출되어야 하는지, (b) 어떤 파라미터를 사용해야 하는지 이해해요. 어떤 필드가 특정 값으로 제한된다면, 설명적인 카테고리 이름을 담은 "enum"을 제공할 수도 있어요.
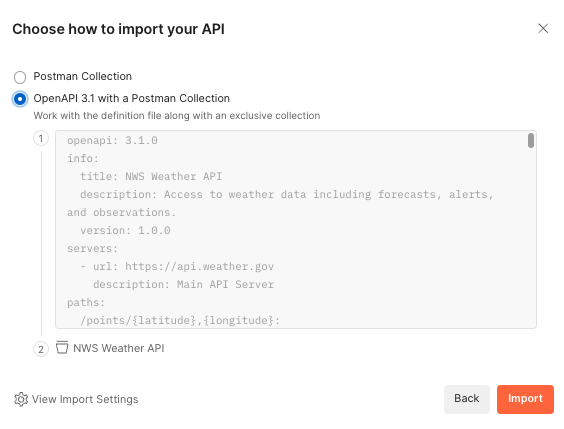
Open API 스키마를 GPT Action에 그대로 넣어 바로 시도해 볼 수도 있지만, ChatGPT 안에서 직접 디버깅하는 것은 어려울 수 있어요. Postman 같은 제3자 서비스를 사용해 API 호출이 제대로 동작하는지 테스트할 것을 권장해요. Postman은 무료로 가입할 수 있고, 오류 처리가 자세하며, 인증 옵션이 풍부해요. Open API 스키마를 직접 가져오는 옵션도 제공해요(아래 참고).
2단계: 인증 요구 사항 파악
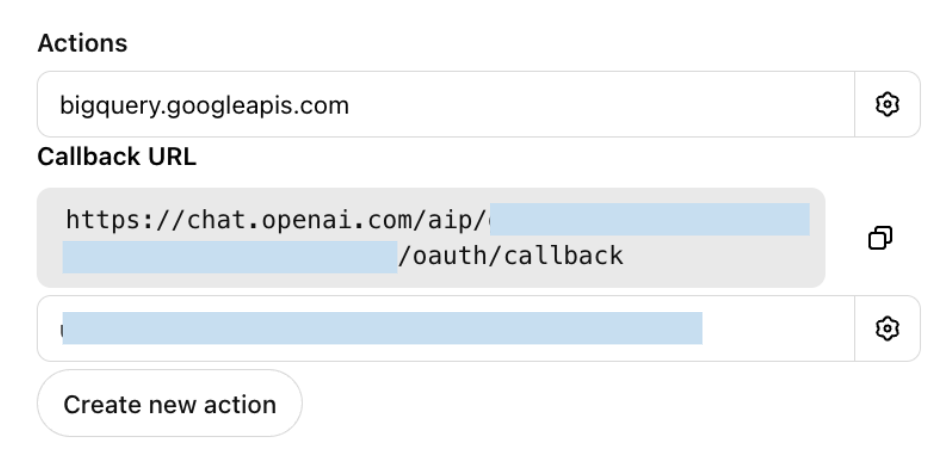
이 Weather 제3자 서비스는 인증이 필요 없으므로, 이 Custom GPT에서는 그 단계를 건너뛰면 돼요. 인증이 필요한 다른 GPT Action의 경우 API Key 또는 OAuth 두 가지 옵션이 있어요. 대부분의 일반적인 애플리케이션에서는 ChatGPT에게 물어보면 시작하는 데 도움이 돼요. 예를 들어 Google Cloud에 OAuth로 인증해야 한다면, 스크린샷을 제공하고 이렇게 물어볼 수 있어요: "I'm building a connection to Google Cloud via OAuth. Please provide instructions for how to fill out each of these boxes."
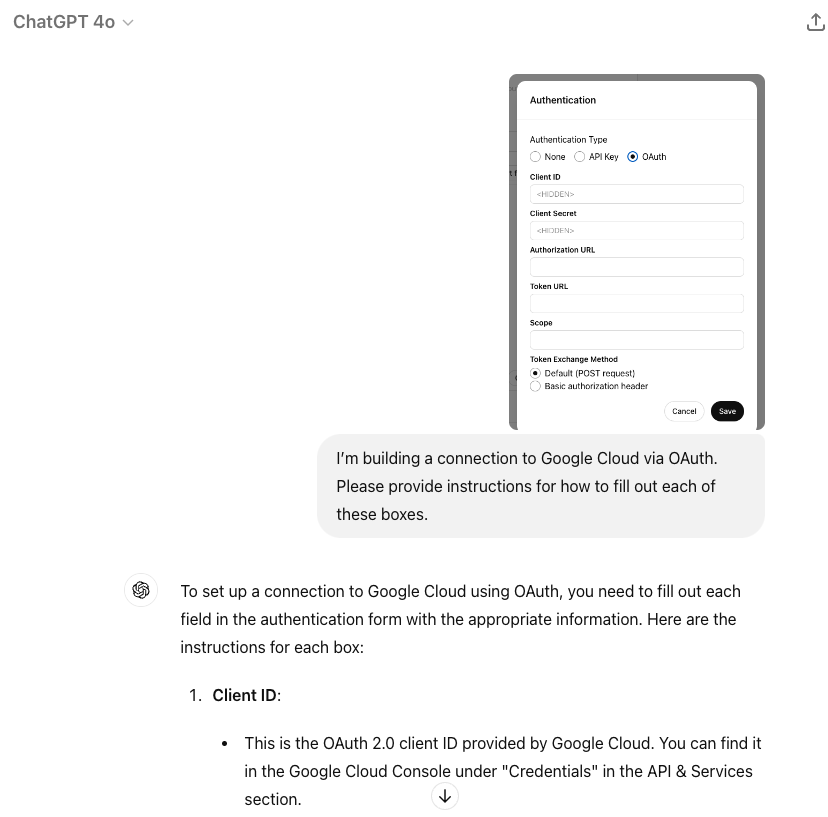
종종 ChatGPT는 5가지 요소 모두에 올바른 안내를 제공해요. 그 기본 요소를 준비한 뒤에는 Postman이나 유사한 서비스에서 인증을 테스트하고 디버깅해 보세요. 오류가 발생하면 그 오류를 ChatGPT에 제공하면, 보통 그 지점부터 디버깅을 도와줘요.
3단계: GPT Action 생성 및 테스트
이제 Custom GPT를 만들 차례예요. Custom GPT를 한 번도 만들어 본 적이 없다면 Creating a GPT guide에서 시작해 주세요.
- Custom GPT를 설명할 이름, 설명, 이미지를 제공해요
- Action 섹션으로 가서 Open API 스키마를 붙여 넣어요. 지침을 작성할 때 Action 이름과 json 파라미터를 기록해 두세요
- 인증 설정을 추가해요
- 메인 페이지로 돌아가 지침을 추가해요
성공적인 지침을 작성하는 방법은 여러 가지가 있어요. 가장 중요한 것은 지침이 모델이 사용자의 선호를 반영하도록 만들 수 있어야 한다는 점이에요.
일반적으로 세 가지 섹션이 있어요:
- 모델에게 GPT Action이 무엇을 하는지 설명하는 Context(맥락)
- 단계 순서에 대한 Instructions(지침) – 여기서 Action 이름과 API 호출이 주의해야 할 파라미터를 언급해요
- 유의할 점이 있다면 Additional Notes(추가 참고 사항)
다음은 Weather GPT에 대한 지침 예시예요. 지침이 Open API 스키마의 API 동작 이름과 json 파라미터를 어떻게 언급하는지 주목해 주세요.
**Context**: A user needs information related to a weather forecast of a specific location.

**Instructions**:
1. The user will provide a lat-long point or a general location or landmark (e.g. New York City, the White House). If the user does not provide one, ask for the relevant location
2. If the user provides a general location or landmark, convert that into a lat-long coordinate. If required, browse the web to look up the lat-long point.
3. Run the "getPointData" API action and retrieve back the gridId, gridX, and gridY parameters.
4. Apply those variables as the office, gridX, and gridY variables in the "getGridpointForecast" API action to retrieve back a forecast
5. Use that forecast to answer the user's question

**Additional Notes**:
- Assume the user uses US weather units (e.g. Fahrenheit) unless otherwise specified
- If the user says "Let's get started" or "What do I do?", explain the purpose of this Custom GPT
GPT Action 테스트하기
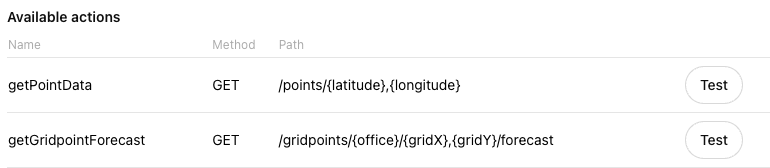
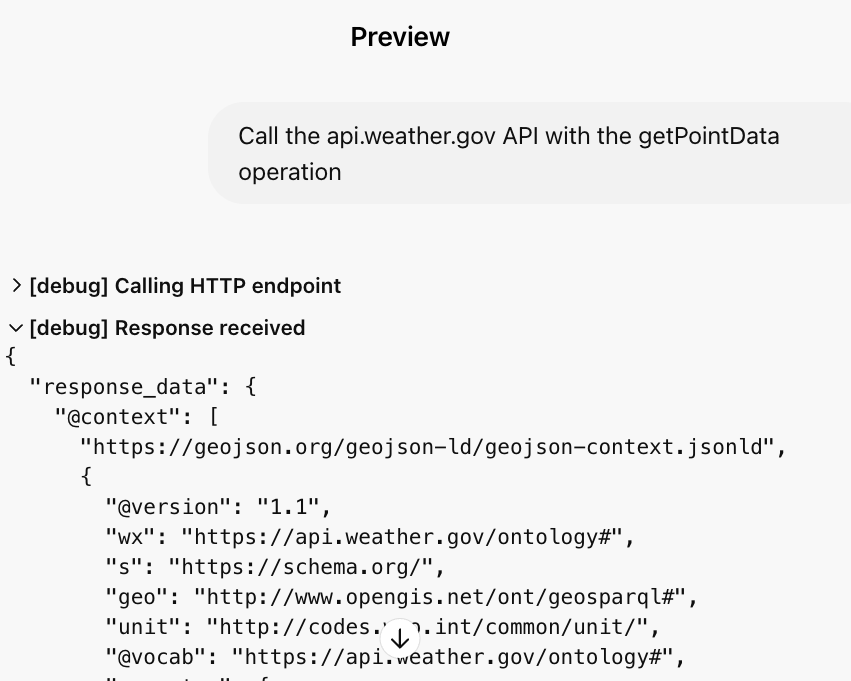
각 액션 옆에 Test 버튼이 보일 거예요. 각 액션에 대해 그 버튼을 클릭하세요. 테스트에서 각 API 호출의 상세한 입력과 출력을 볼 수 있어요.
API 호출이 Postman 같은 제3자 도구에서는 동작하는데 ChatGPT에서는 동작하지 않는다면, 몇 가지 원인이 있을 수 있어요:
- ChatGPT의 파라미터가 잘못되었거나 누락되었음
- ChatGPT에서의 인증 문제
- 지침이 불완전하거나 명확하지 않음
- Open API 스키마의 설명이 명확하지 않음
4단계: 제3자 앱에 콜백 URL 설정
GPT Action이 OAuth 인증을 사용한다면, 제3자 애플리케이션에 콜백 URL을 설정해야 해요. OAuth를 사용하는 GPT Action을 설정하면 ChatGPT가 콜백 URL을 제공해 줘요(이 URL은 OAuth 파라미터 중 하나를 업데이트할 때마다 갱신돼요). 그 콜백 URL을 복사해 애플리케이션의 적절한 위치에 추가하세요.
5단계: Custom GPT 평가
위 단계에서 GPT Action을 테스트했더라도, 지침과 GPT Action이 사용자가 기대하는 방식으로 기능하는지 여전히 평가해야 해요. Custom GPT에 물어볼 "evaluation set"(평가 세트) 질문으로 대표성 있는 질문을 최소 5~10개(많을수록 좋아요) 만들어 보세요.
핵심: Custom GPT가 여러분의 질문 각각을 기대한 대로 처리하는지 테스트해 보세요.
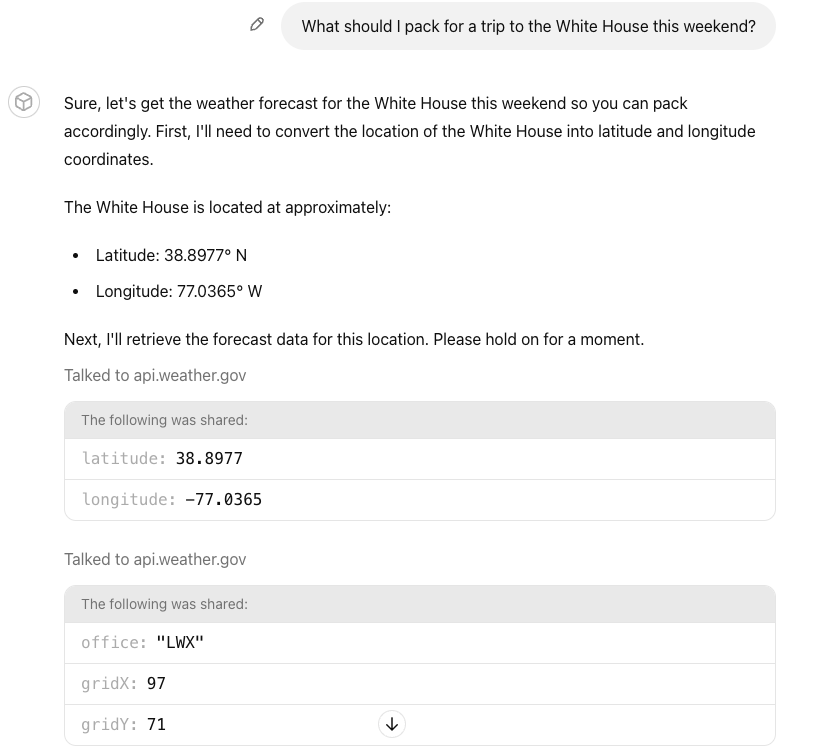
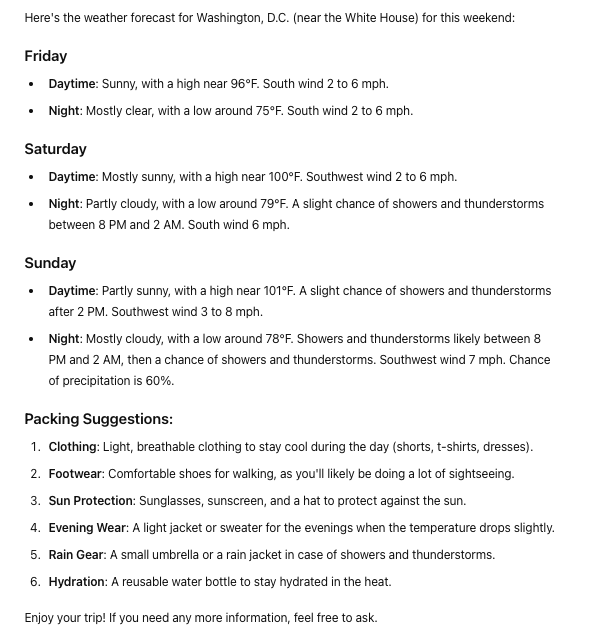
예시 질문: "What should I pack for a trip to the White House this weekend?" 이 질문은 Custom GPT가 (1) 랜드마크를 lat-long으로 변환하고, (2) 두 GPT Action을 모두 실행하며, (3) 사용자 질문에 답하는 능력을 테스트해요.
일반적인 디버깅 단계
문제: GPT Action이 잘못된 API 호출을 호출하고 있음(또는 전혀 호출하지 않음)
- 해결책: Action의 설명이 명확한지 확인하고, Custom GPT 지침에서 Action 이름을 언급하세요
문제: GPT Action이 올바른 API 호출을 호출하지만 파라미터를 제대로 사용하지 않음
- 해결책: GPT Action에서 파라미터의 설명을 추가하거나 수정하세요
문제: Custom GPT가 동작하지 않지만 명확한 오류가 보이지 않음
- 해결책: Action을 테스트해 보세요. 테스트 창에는 더 상세한 로그가 있어요. 그래도 명확하지 않다면 Postman이나 다른 제3자 서비스를 사용해 더 잘 진단하세요
문제: Custom GPT가 인증 오류를 발생시킴
- 해결책: 콜백 URL이 올바르게 설정되었는지 확인하세요. Postman이나 다른 제3자 서비스에서 똑같은 인증 설정을 테스트해 보세요
문제: Custom GPT가 더 어렵거나 모호한 질문을 처리하지 못함
- 해결책: Custom GPT의 지침을 프롬프트 엔지니어링해 보세요. 예시는 prompt engineering guide를 참고하세요
이것으로 Custom GPT 구축 가이드를 마칩니다. 추가 질문이 있으면 OpenAI developer forum을 활용하며 구축에 행운이 있길 바랍니다.
더 알아보기 (Learn more)
관련 문서: GPT Actions 소개와 GPT Actions 인증을 참고하세요.